This tutorial takes the user through distinct steps involved in
archiving a worcs project on ‘Zenodo’. As open science
infrastructure is an area of active development, the approach proposed
here should not be considered definitive, but rather, as one proposal
for a FAIR-compliant way to archive code repositories using
infrastructure available at the time of writing.
Check ‘Git’ and ‘GitHub’
Start by opening the project folder, for example, in ‘RStudio’.
We will use ‘Git’ to version control the project folder. If you do not already have ‘Git’ installed on your computer, install it now. You can verify that ‘Git’ is installed and working by running:
worcs::check_git()If ‘Git’ is indeed installed, you can check whether your current project is using ‘Git’ for version control. Run:
gert::git_status()This should return a tibble with all files being tracked
by ‘Git’. Next, run:
worcs::check_github()You should receive a notification that
"Active project has a remote repository". If you do not
receive this notification, first connect your local repository to
GitHub.
Optionally: Connect Local to Remote (‘GitHub’) Repository
If your local repository is not yet connected to ‘GitHub’, do so now.
Before proceeding, ensure you have a
‘GitHub’ account. Academics may qualify for a free upgrade. To
authorize ‘R’ to interact with your ‘GitHub’ account, run
usethis::create_github_token(), which takes you to a
website to create a personal access token (PAT). Copy it, then run
gitcreds::gitcreds_set() and paste the PAT when asked. If
you still experience problems try usethis::gh_token_help()
for help.
To check that you are ready to proceed, run:
worcs::check_github()If you see a green checkmark, you can create a new repository on ‘GitHub’ directly from ‘R’:
worcs::git_remote_create("repository_name", private = FALSE)This command will create a new public repository on ‘GitHub’ and link
it to your local repository. The private = FALSE argument
ensures the repository is public by default.
Alternatively, you may have already created a remote repository on
the ‘GitHub’ website. Either way, replace repository_name
with the actual name you want to use, and connect your local repository
like so:
worcs::git_remote_connect(project_path, remote_repo = "repository_name")Snapshot renv Dependencies
To ensure that your local R-package dependencies are correctly
archived, your project should use renv. Before actually
archiving the project, you should make sure that these dependencies are
up to date. Do this by running:
renv::snapshot()Pushing These Changes to the Remote Repository
Version control requires adding files to be tracked to the repository
(gert::git_add()), committing changes to those files
(gert::git_commit()), and pushing them to the remote
repository (gert::git_push()). The worcs
function worcs::git_update() combines these three actions,
acting like a kind of “quick-save” function:
worcs::git_update("Preparing to archive my project")Check Your ‘GitHub’ Repository
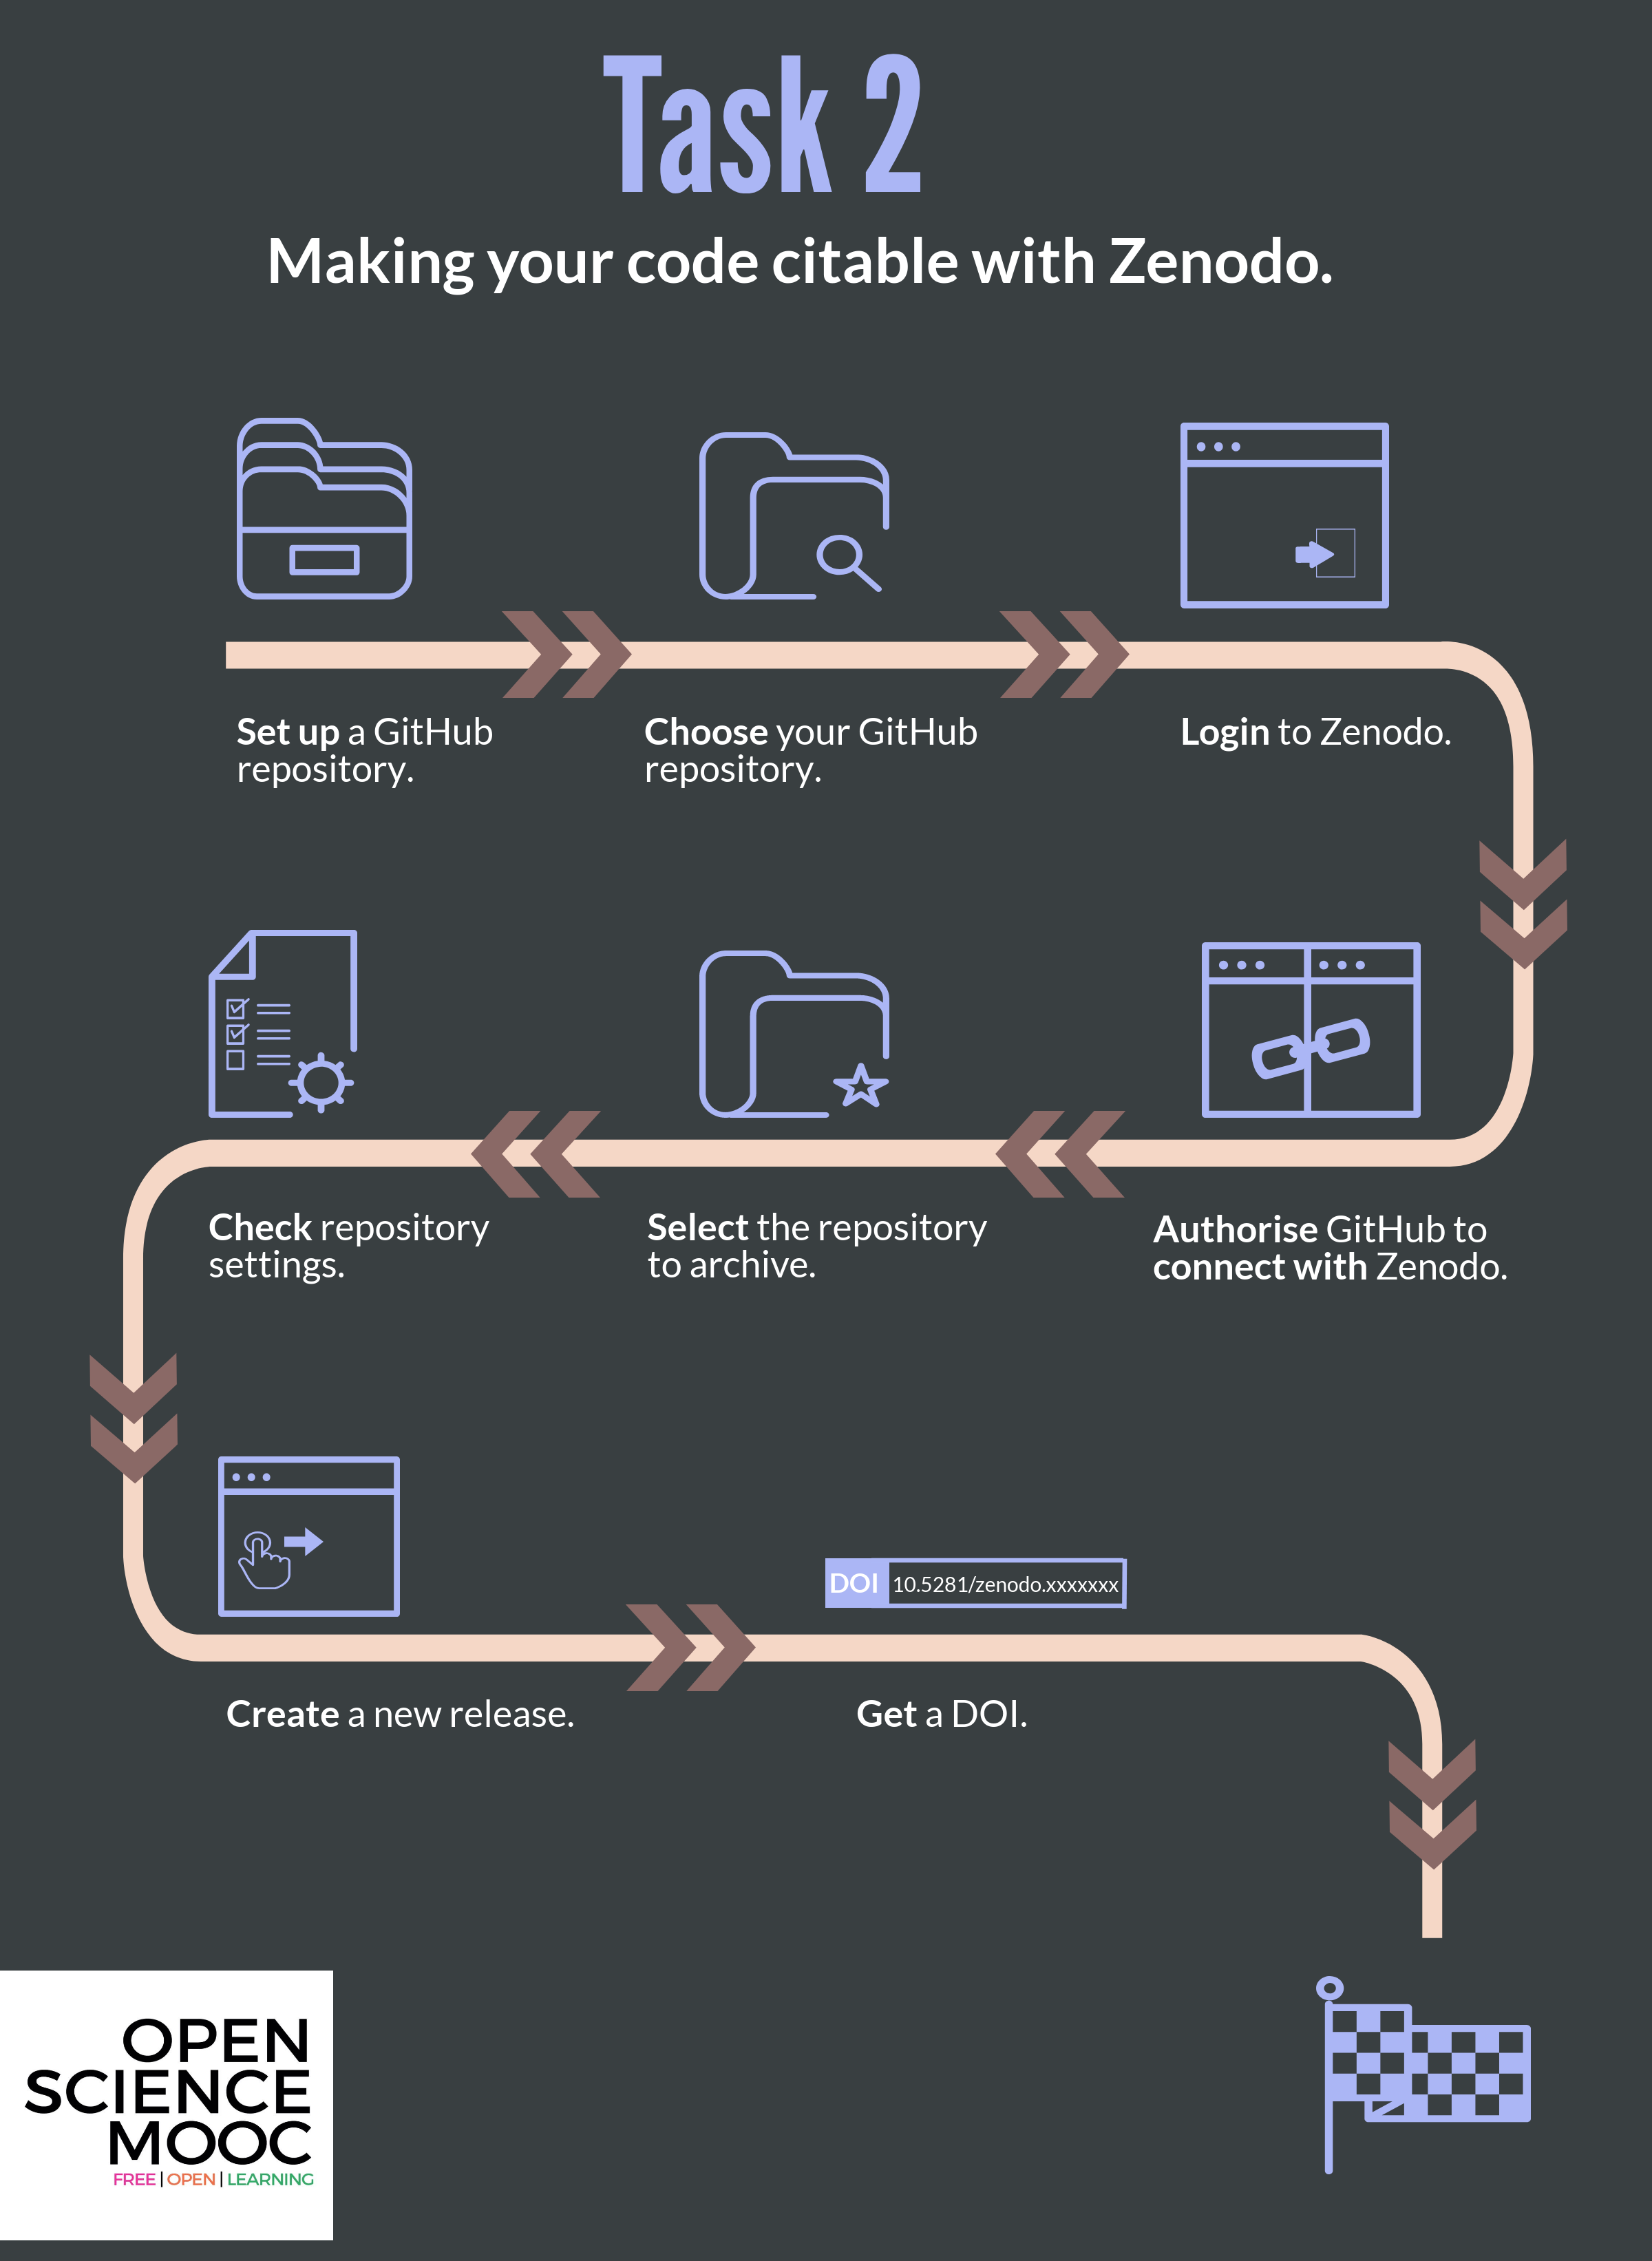
Navigate to your repository on ‘GitHub’ and check that all committed files are now visible in the remote repository. Furthermore, the repository visibility must be set to “Public” to ensure that ‘Zenodo’ can discover and archive it. If necessary, change the visibility setting to Public by clicking on “Settings” > “General” > “Change repository visibility.”
Login to ‘Zenodo’
Head over to zenodo.org. ‘Zenodo’ is a platform where you can permanently archive your code and other project elements. ‘Zenodo’ does this by assigning projects a Digital Object Identifier (DOI), which also helps to make the work more citable. This is different to ‘GitHub’, which acts as a place where the actual work on a project takes place, rather than long-term archiving of it. At ‘GitHub’, content can be modified, deleted, rewritten, and irreversibly changed, which makes it a bit concerning to be used for longer lasting referencing purposes. ‘Zenodo’ offers more security and permanence for research outputs.

Sign up for ‘Zenodo’
If you already have a ‘Zenodo’ account, this is easy. If not, follow the steps to create one — you can login using your ‘GitHub’ account.
Authorize ‘GitHub’ to connect with ‘Zenodo’
On the ‘Zenodo’ website authorize it to connect to your ‘GitHub’ account in the ‘Using ’GitHub’’ section. Here, ‘Zenodo’ will redirect you to ‘GitHub’ to ask for permissions to use ‘webhooks’ on your repositories. You want to authorize ‘Zenodo’ here with the permissions it needs to form those links.

Authorize to connect with ‘GitHub’
Select the Repository to Archive
If you have got this far, this means that ‘Zenodo’ is now authorized to configure the repository webhooks that it needs to archive the repository and issue it a DOI. To do this, on the ‘Zenodo’ website navigate to the ‘GitHub’ repository listing page and simply “flip the switch” next to your repository. If your repository does not show up in the list, you may need to press the ‘Synchronize now’ button. At the time of writing, we noticed that it can take quite a while (hours?) for ‘Zenodo’ to detect new ‘GitHub’ repositories. If so, take a break or come back to this last step tomorrow!

Enable individual ‘GitHub’ repositories to be archived in ‘Zenodo’
Optional: Check repository settings
If you were successful, you have now set up a new webhook between ‘Zenodo’ and your repository.
Optionally, you can verify this. In ‘GitHub’, click on the settings for your repository, and the Webhooks tab on the left hand side menu. This should display the new ‘Zenodo’ webhook configured to ‘Zenodo’. Note, it may take a little time for the webhook listing to show up.

Check that webhooks are enabled for your ‘GitHub’ repository.
Create a New Release
To archive a repository on ‘Zenodo’, you must create a new release. You can do this using the following code:
worcs::git_release_publish()If you have not previously published any releases, this function will assume that you want to use semantic versioning for both the release tag and the release title. This means that the first release will be labeled with version number “0.1.0”. Each subsequent release will automatically increment the trailing digit, i.e.: “0.1.1”, “0.1.2”. If you make a major change to your project, you may want to manually increment the middle digit like so:
worcs::git_release_publish(repo = ".",
                           tag_name = "0.2.0",
                           release_name = "0.2.0")
Verify on ‘Zenodo’
To verify that your release was archived on ‘Zenodo’ and assigned a DOI, you need to visit the Uploads tab.

Check the new release has been uploaded.
Optionally: Updating Meta-Data
We can further document our ‘Zenodo’ archive by adding some extra information on ‘Zenodo’. On ‘Zenodo’ click the Upload tab in the main menu, where you should find your newly uploaded repository.

Click the orange Edit button.
Verifying That ‘Zenodo’ Mints a DOI for Your Project
After publishing a release, ‘Zenodo’ will archive the repository and mint a DOI. Verify this by checking the ‘Zenodo’ entry for your repository, where the DOI will be displayed. Include this DOI in any citations or references to your code to enhance its discoverability and reusability.
The ‘GitHub’/‘Zenodo’ integration will assign one “mother-DOI” to the project, which will always resolve to the latest version, as well as a unique DOI to each version/release of the code. This enables users to refer to and cite either the repository in general or specific versions of it. The list of authors for the citation is automatically determined by the ‘GitHub’ user account names used by the repository - this can be edited on ‘Zenodo’, as explained above. DOIs used in ‘Zenodo’ are registered through the DataCite service.
Pro-tip: Check the
Citationfield on the ‘Zenodo’ page, and copy-paste it into the README file of your ‘GitHub’ repo to make cross-linking even easier (or refer users to the ‘Zenodo’ page to find the citation, which obviates the need to manually update this information). Click the DOI badge in theDetailsfield to get instructions on how to add a clear highlighted DOI badge to your ‘GitHub’ repository, for users to see and make use of your DOI:
![]()
CONGRATULATIONS!
Your repository is now archived in ‘Zenodo’, and with a DOI that can be versioned to reflect updates to the repository version through time. You should be able to see details of this on the ‘GitHub’ ‘Zenodo’ page for your repository. This also means that your archived projects can get picked up by other indexing services and search engines that use DOIs too.
Providing a long-term archive and a DOI for your work is required for others to be able to properly cite it, as this provides basic citation metadata. For Open Science, it is important to be able to comprehensively cite the resources that you use in your research, including code, and this workflow enables that to happen, in line with best practices.
Pro-tip: Is your research funded by an EU grant? Now you can directly connect your repository to your grant by updating the grant section of the metadata on the project’s ‘Zenodo’ record. This massively helps to increase its discoverability!